Integrating the kitchen and opening up spaces in North Vancouver
I call it sweet, because it’s mine and I’m so grateful and relieved to have a functional kitchen!
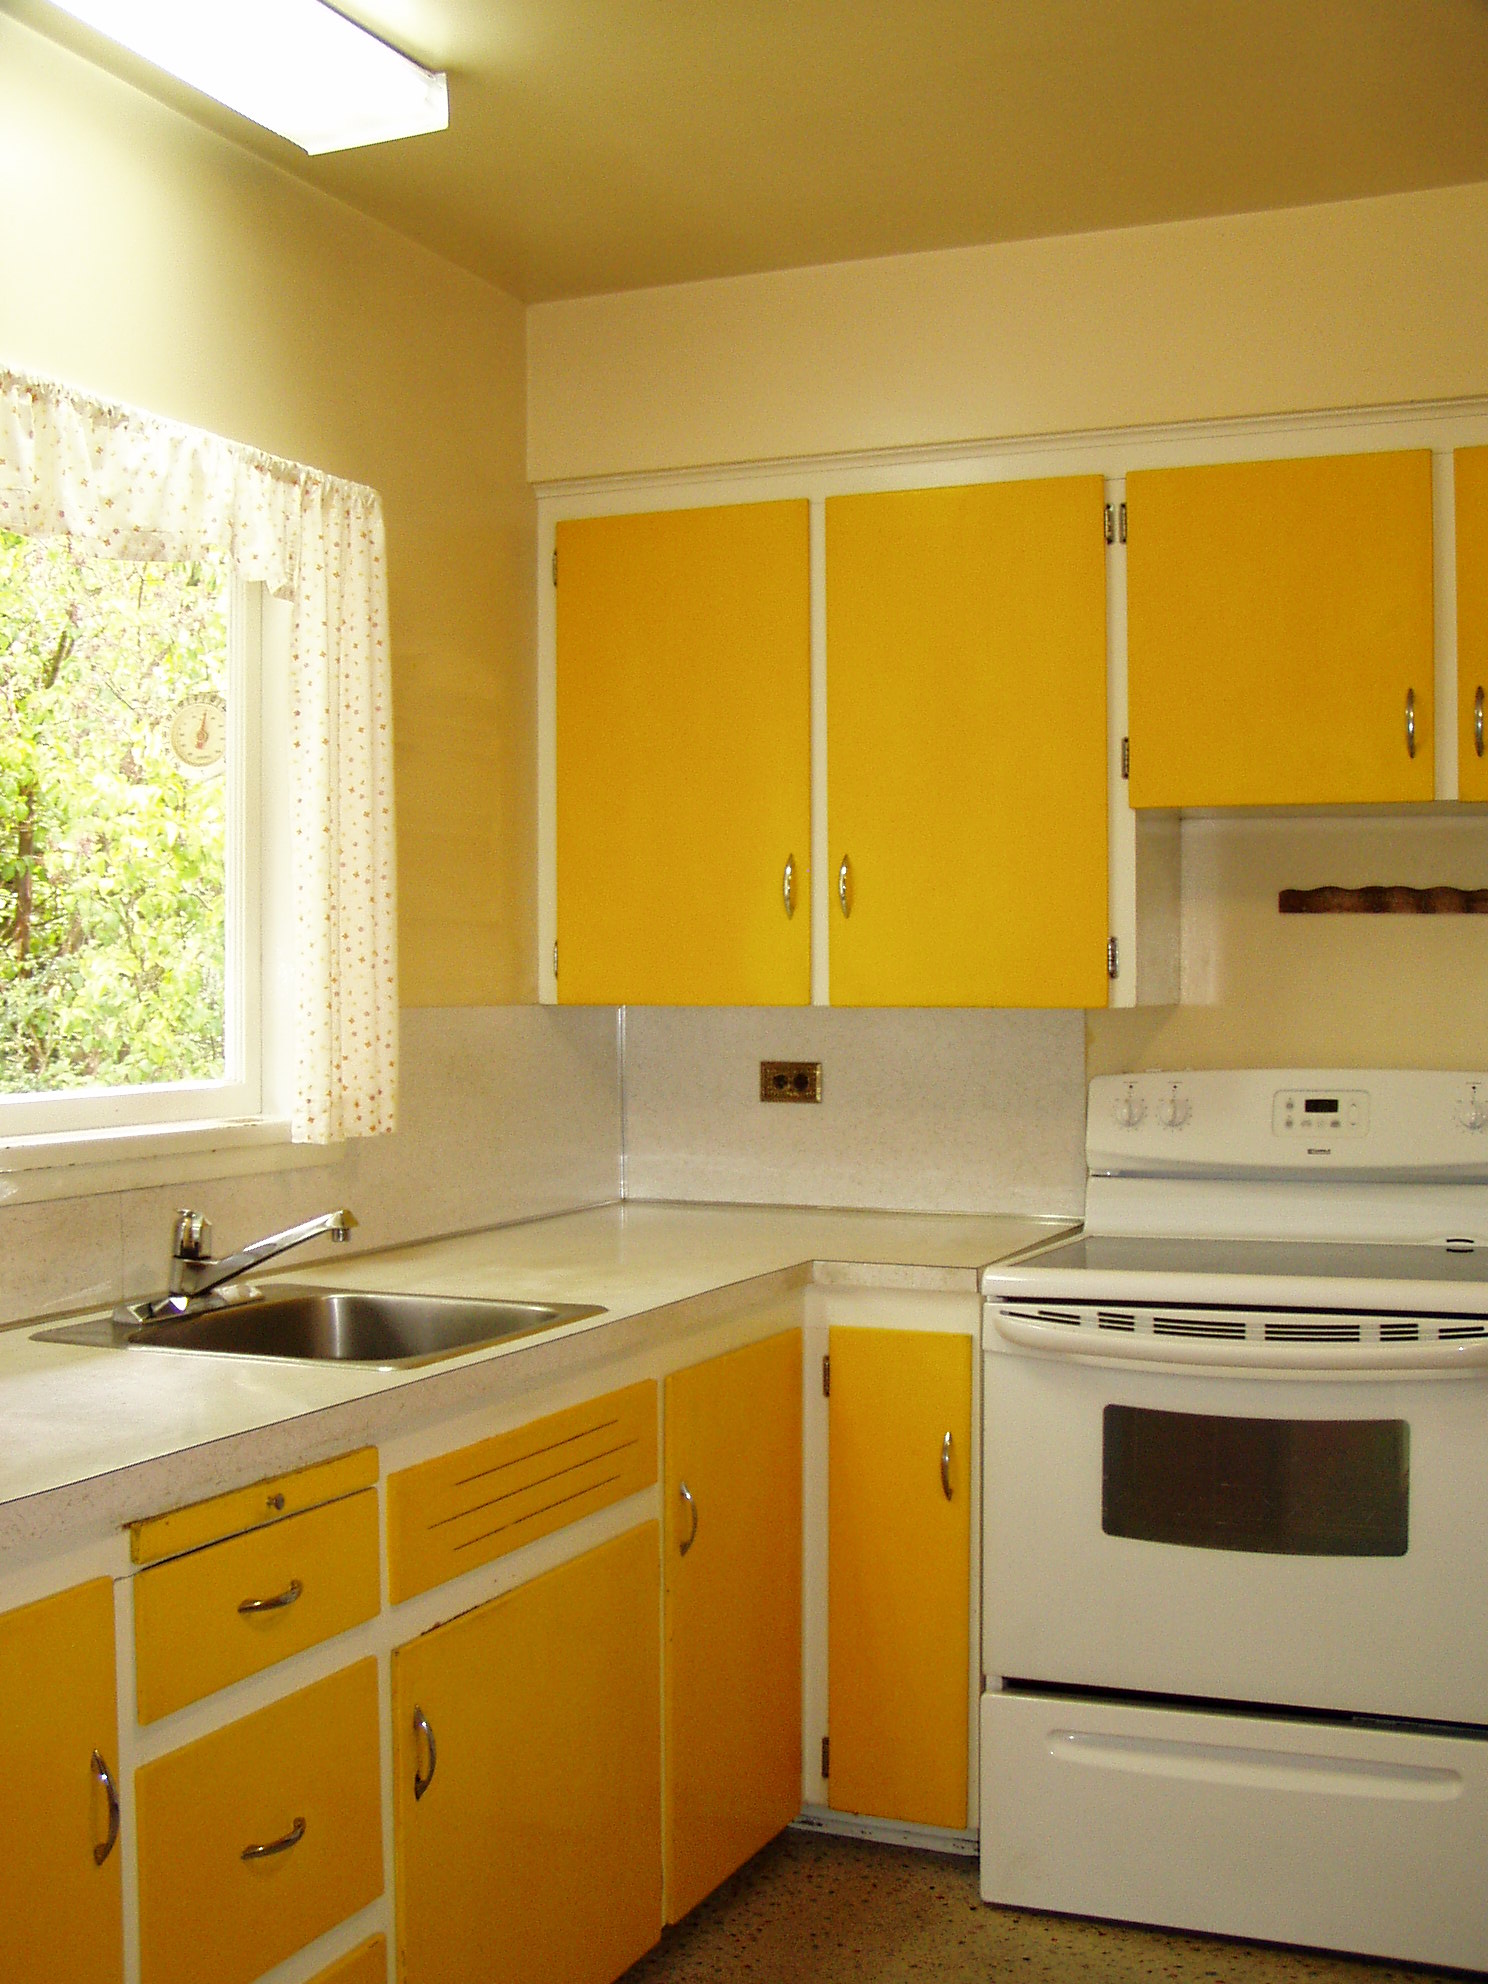
To glimpse back in time to 1950, when it was originally designed, we see a small, enclosed room. Back then, the act of food preparation was hidden out of sight, the kitchen usually an isolated space.

")
The family that came before us raised six children in this kitchen, so I’m pretty sure the room never really felt isolated. I imagine a lot happened around that kitchen table. Fast forward to today and you will see an opening up; the obvious convenience of integrating kitchen, dining and living spaces.
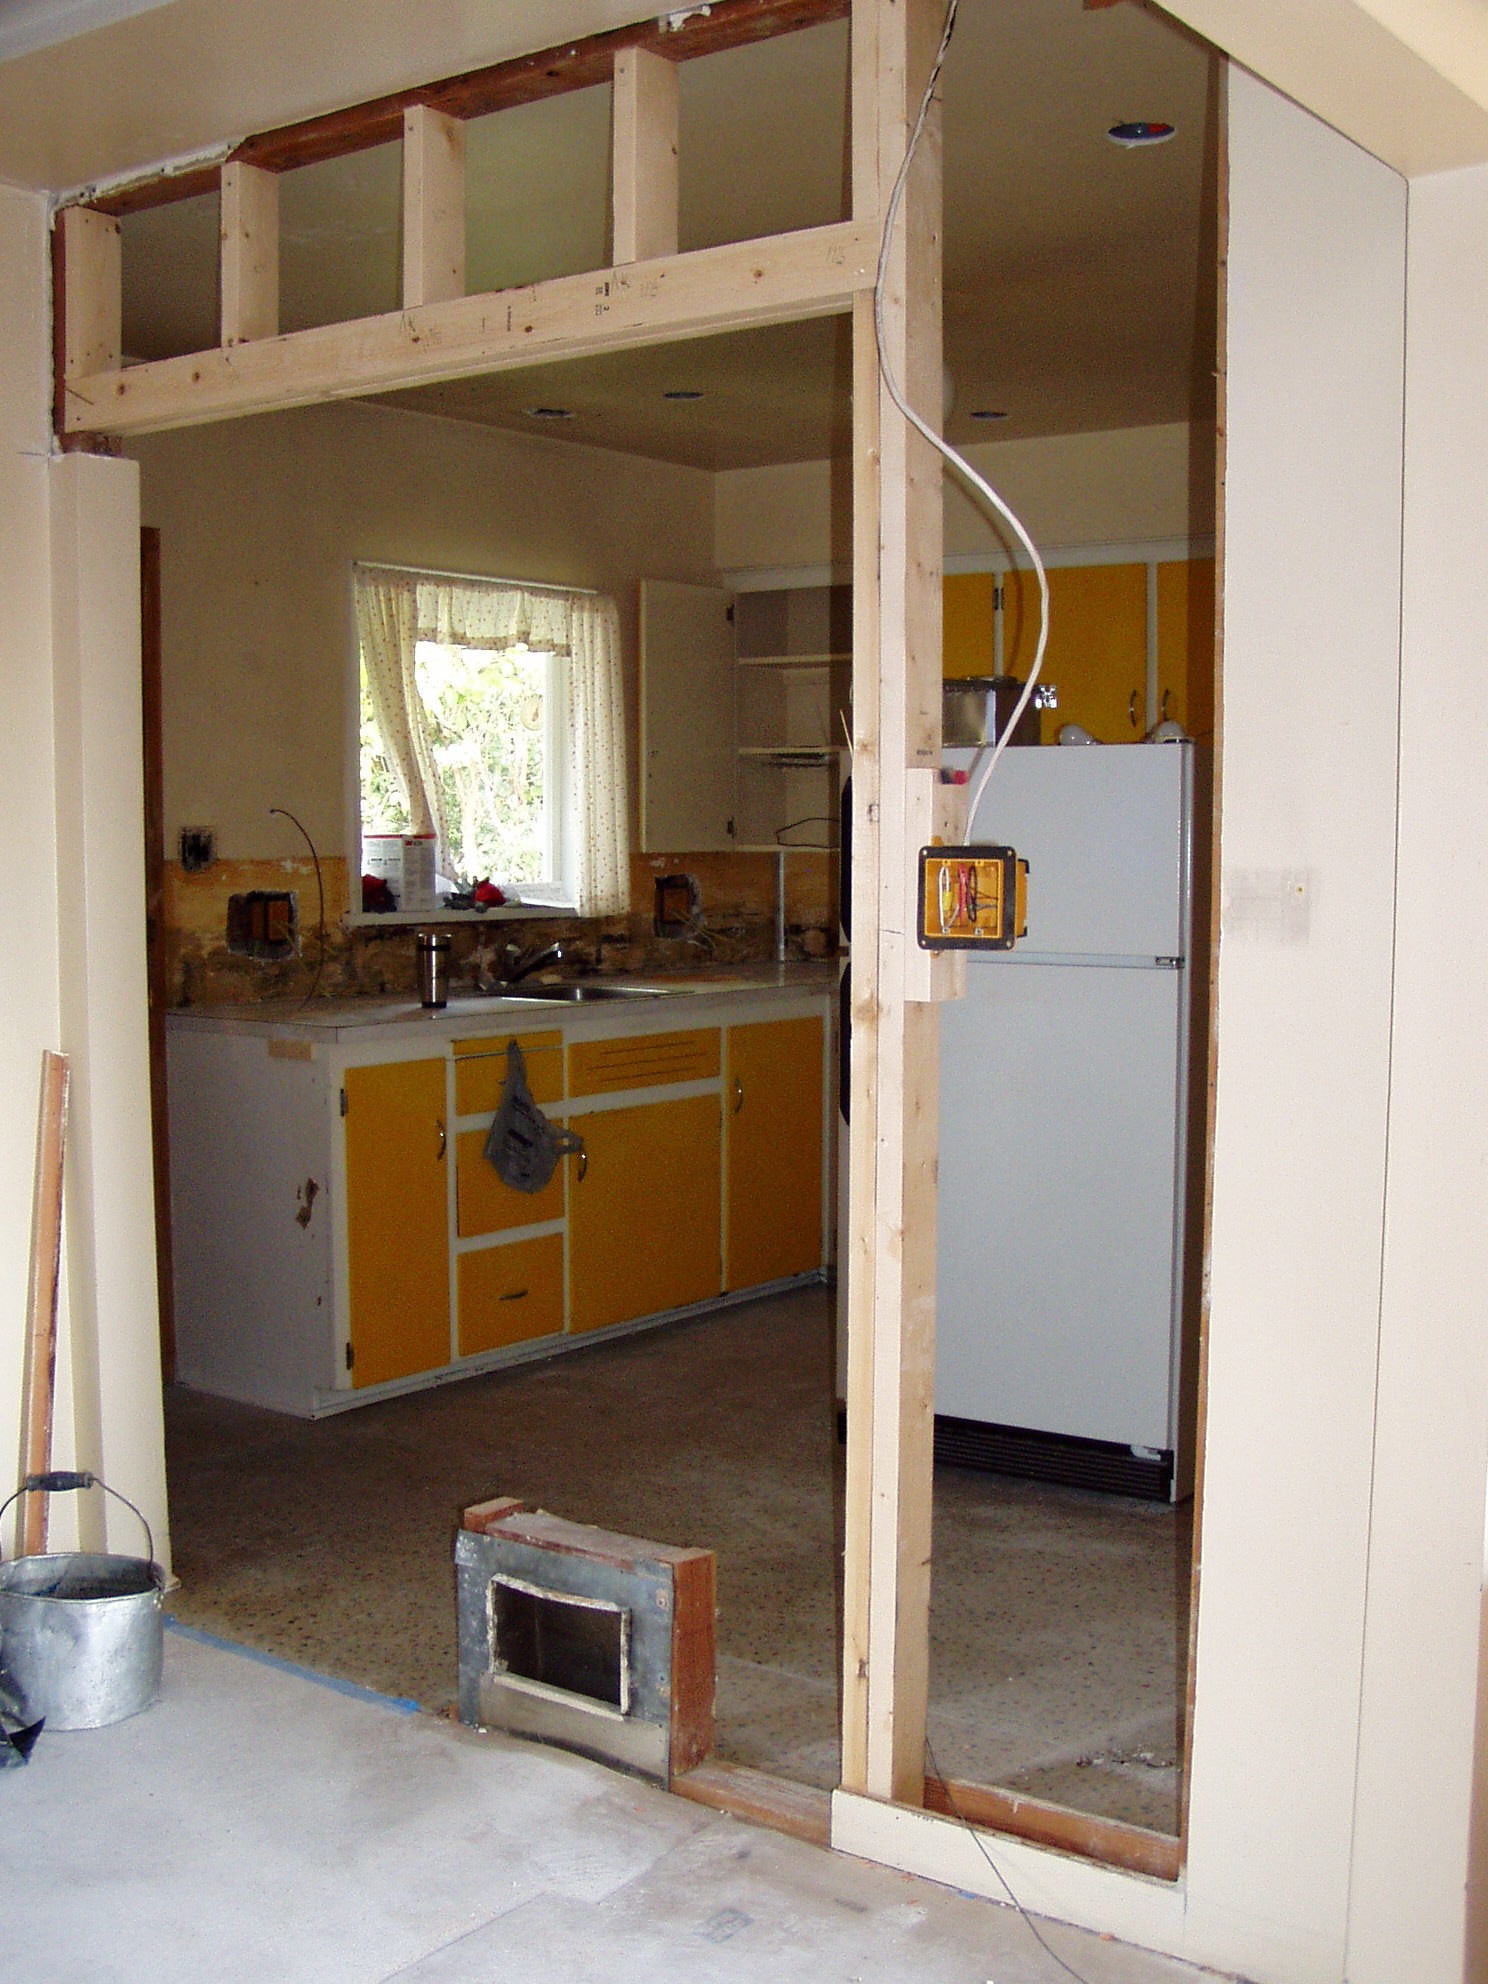
We did the renovation in stages. As soon as we purchased the house we removed most of the wall between the kitchen and dining rooms. We had two bathrooms to add, a few electrical and structural projects, hardwood refinishing and paint to take care of before moving in, as well as installing a dishwasher. Then we lived with the kitchen, as is, for a couple of years!

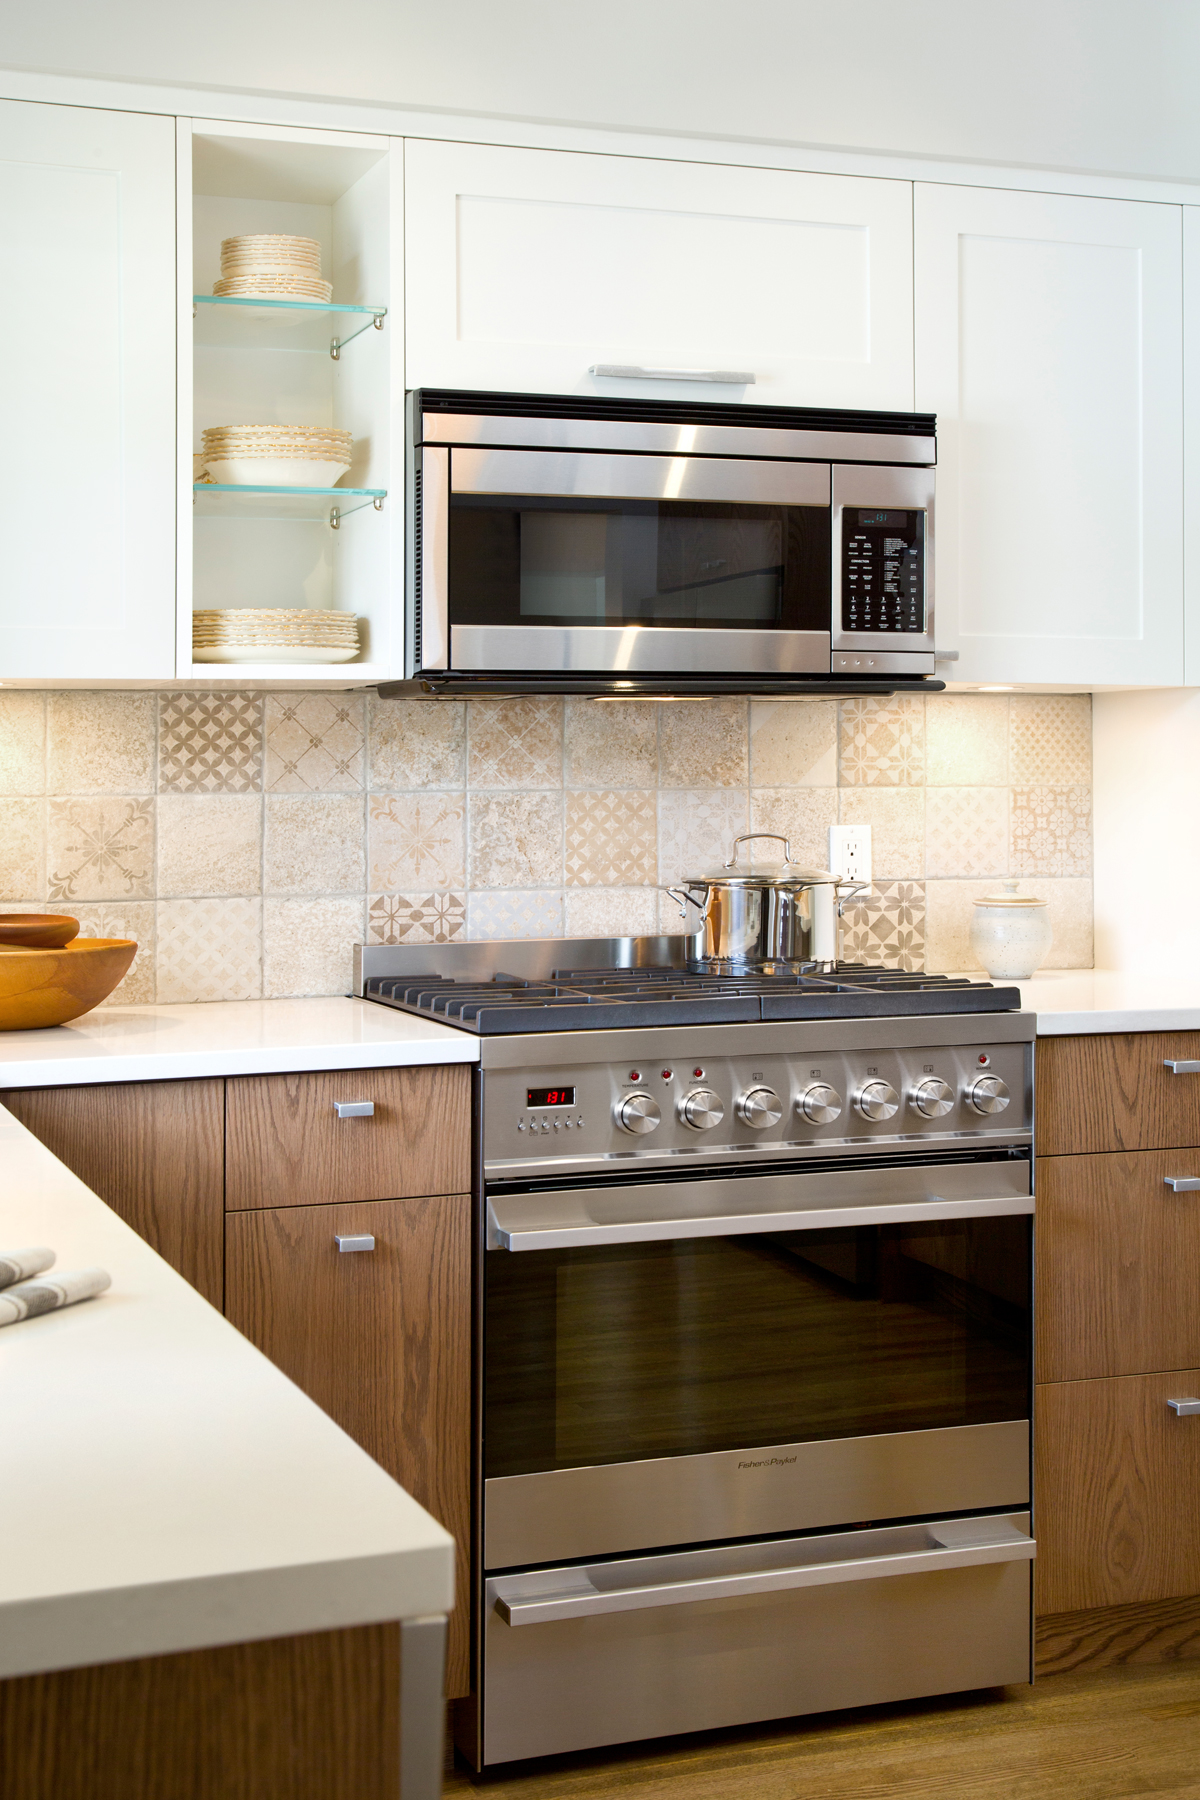
The original cabinets were school bus yellow, which worked well for bringing some light to the north facing room. We opted for a more neutral scheme, even though bright yellows are currently having a “moment”. The flat oak panels on the bottom hide a multitude of splash marks and the white shaker panelled uppers help reflect the light.
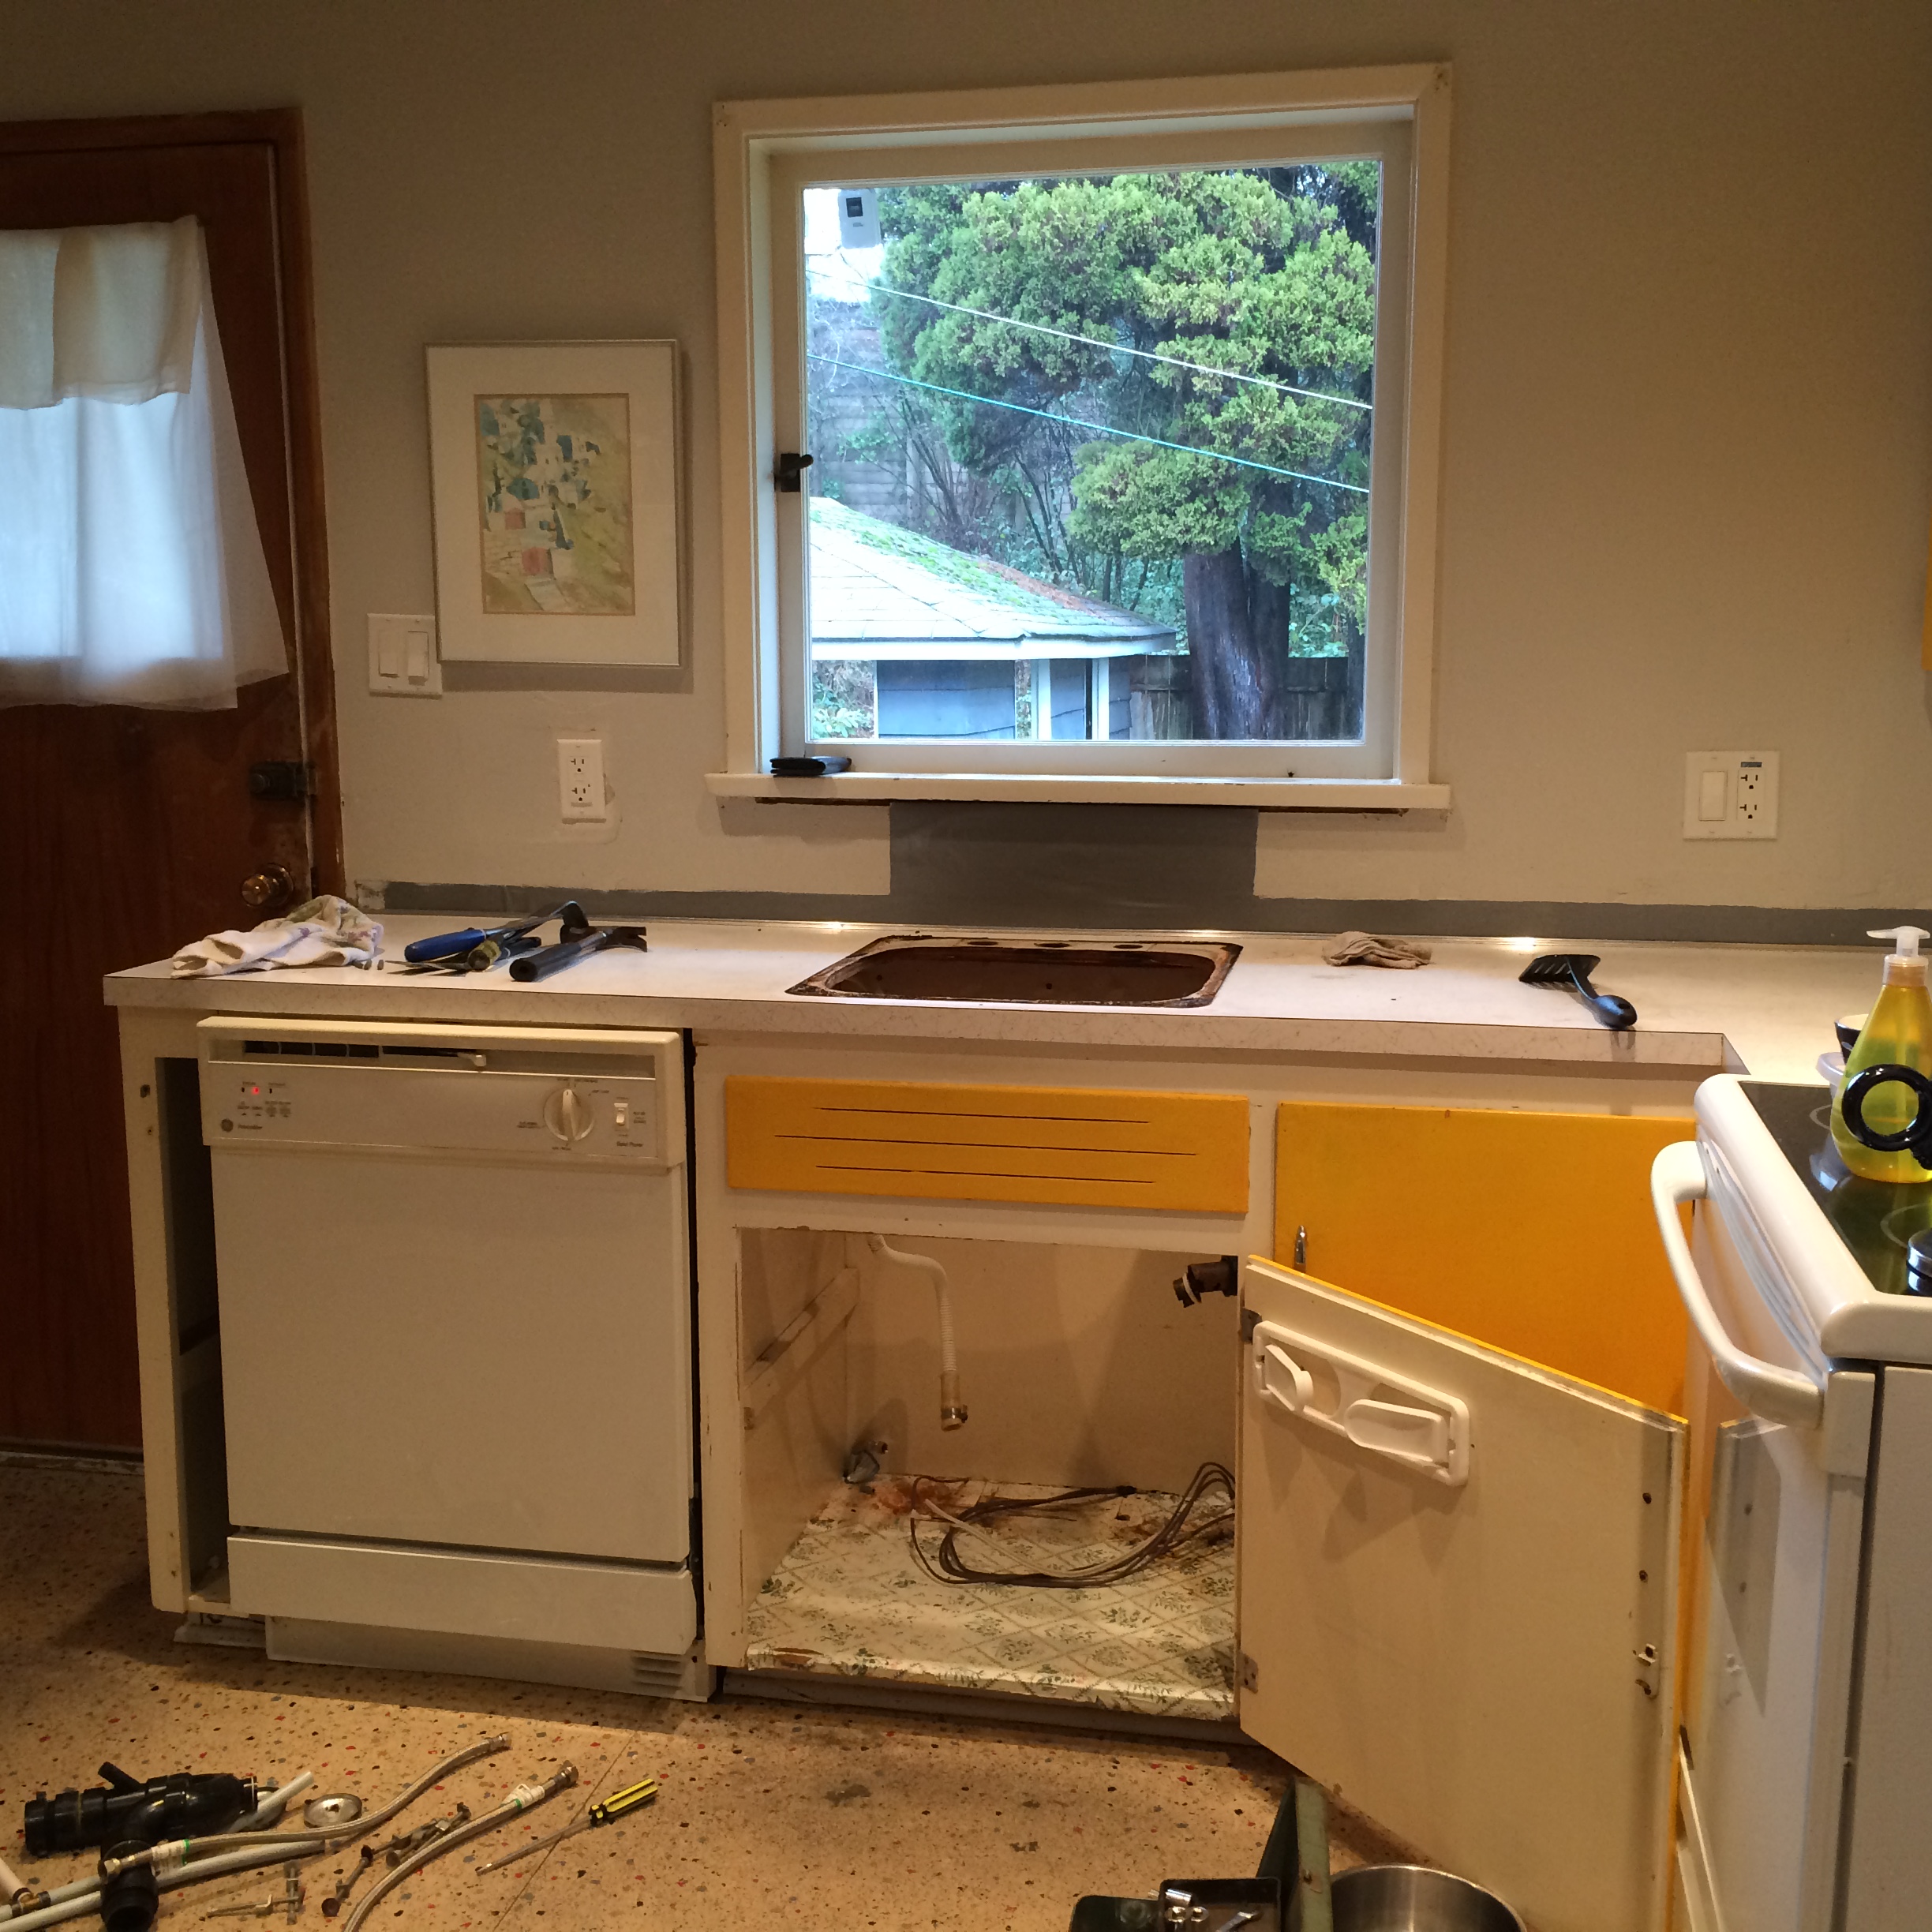
Removing the old cabinets was a very quick job since there were so few and they had no backs. Really made us think it was amazing the kitchen once stored enough food for a family of 8!


The kitchen is small at 11’0” x 11’0”and its center is a crossroads where many paths meet. These two facts were important to consider when laying out the new plan. The fridge was moved closer to the dining area and away from the range. This achieved some elbow room for the cook with counterspace on both sides now. As well, its much easier to load food into the fridge with a counterspace on the left to stack groceries. An island was out of the question as the center had to remain clear for traffic to the dining area, downstairs and outside.


Once the drawings and measurements were complete, the cabinets were ordered. While waiting for the cabinets, the original 1950’s confetti patterned, linoleum had to be dealt with. We decided to leave it and go over top with hardwood. This served two purposes, the old asbestos flooring would not be disturbed, and the hardwood would tie in the existing wood floors on either side. We were careful to select oak strips in the exact width of the existing floors and finished them with the same stain. This is also when appliances and plumbing were ordered. Meanwhile we had set up a temporary kitchen using the basement and upstairs dining area – yes inconvenient and so much fun!
When the cabinets were ready it took about 4 days to install them, handles and all. Then countertops were measured and installed a week later. So close now, just the sink and faucet install and gas fitter for the range. Then appliance day, what a wonderful sight. We were up and running in a beautiful functional kitchen.
We left the tile backsplash for awhile just revelling in our new conveniences. The backsplash was a hard decision as there are so many beautiful tiles and more coming every day. I had expert help with this from Bill van Rikxoort of Fifth + Fir. He really knows his tile and when he showed me the Dordogne Series, I was all in. We love its subtle pattern and the random, not too perfect feel that it imparts.
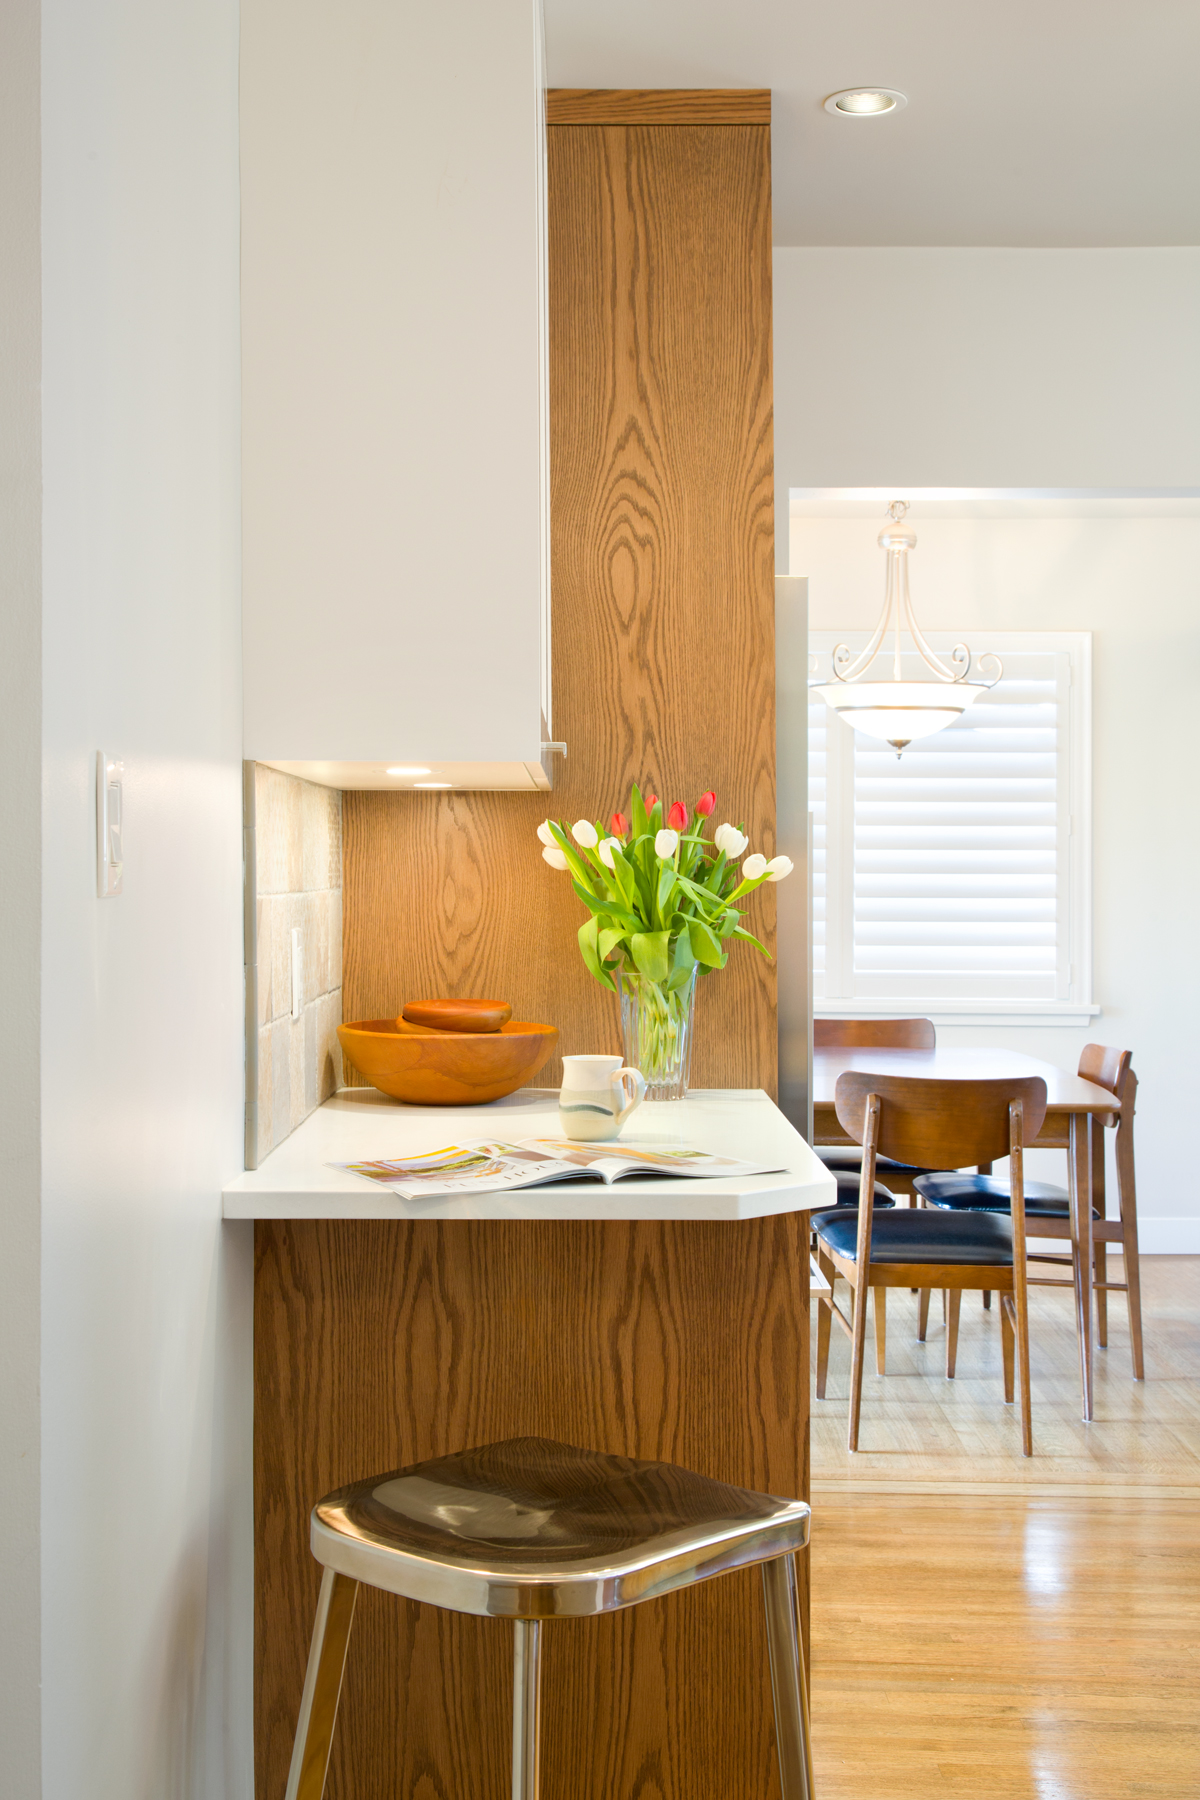
The result of our planning and work is an open kitchen that blends old and new seamlessly. Kitchen renovations are often the bane of most people's forays into home improvement. With some planning and help along the way, it can be a very rewarding experience. I am always interested in kitchen renovations and am glad to help design yours to suit your personal style!
Suppliers
- Cabinets: Citation Kitchens
- Countertop: Caesarstone
- Plumbling: Grohe, Elkay
- Appliances: Fisher Paykel, LG Electronics
- Tile: Unicom Starker (Dordogne Series)
- Interior Design: SMC Interior Design
- Photography: Christina Faminoff Photography